Suite du précédent article sur le ventilateur, voici comment interfacer ce ventilateur avec Home Assistant
1ère étage: Installer avec HACS l’intégration https://github.com/zhbjsh/homeassistant-ssh
2ème étape: créer deux scripts sur le Raspberry avec nano, un pour l’allumage, un pour l’arrêt par exemple
nano ventilateur_on.sh

sudo uhubctl -l 2 -a 1
sudo uhubctl -l 4 -a 1

nano ventilateur_off.sh

sudo uhubctl -l 2 -a 0
sudo uhubctl -l 4 -a 0
Rendre exécutable ces deux scripts placés dans le dossier pi
chmod +x ventilateur_off.sh
chmod +x ventilateur_on.sh
3ème étape: créer un booléan dans le menu entrées
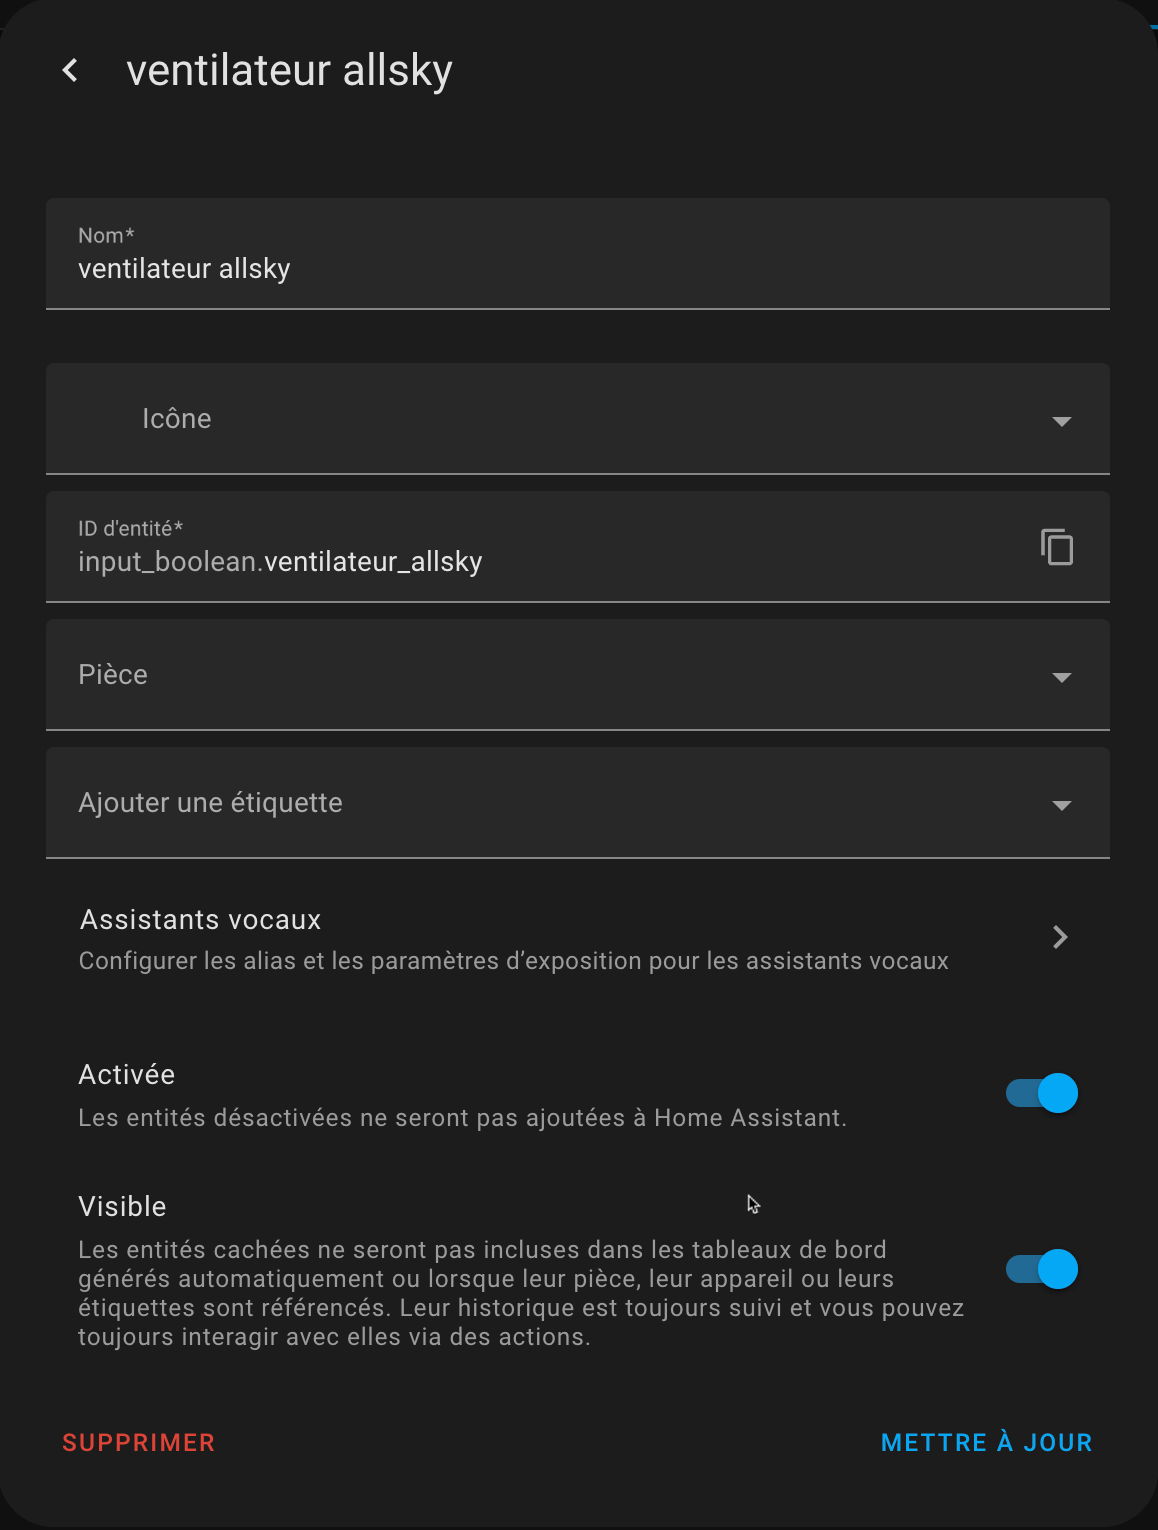
4ème étape: créer deux automatisations pour allumer et éteindre le ventilateur sur le Raspberry
alias: "on"
description: ""
triggers:
  - trigger: state
    entity_id:
      - input_boolean.ventilateur_allsky
    from: "off"
    to: "on"
conditions: []
actions:
  - action: ssh.execute_command
    metadata: {}
    data:
      command: /home/pi/./ventilateur_on.sh
    target:
      device_id: baee8bdf9891c04137408076f2a75f31
mode: single
device_id étant l’id du Raspberry récupéré dans l’éditeur visuel de l’automatisation
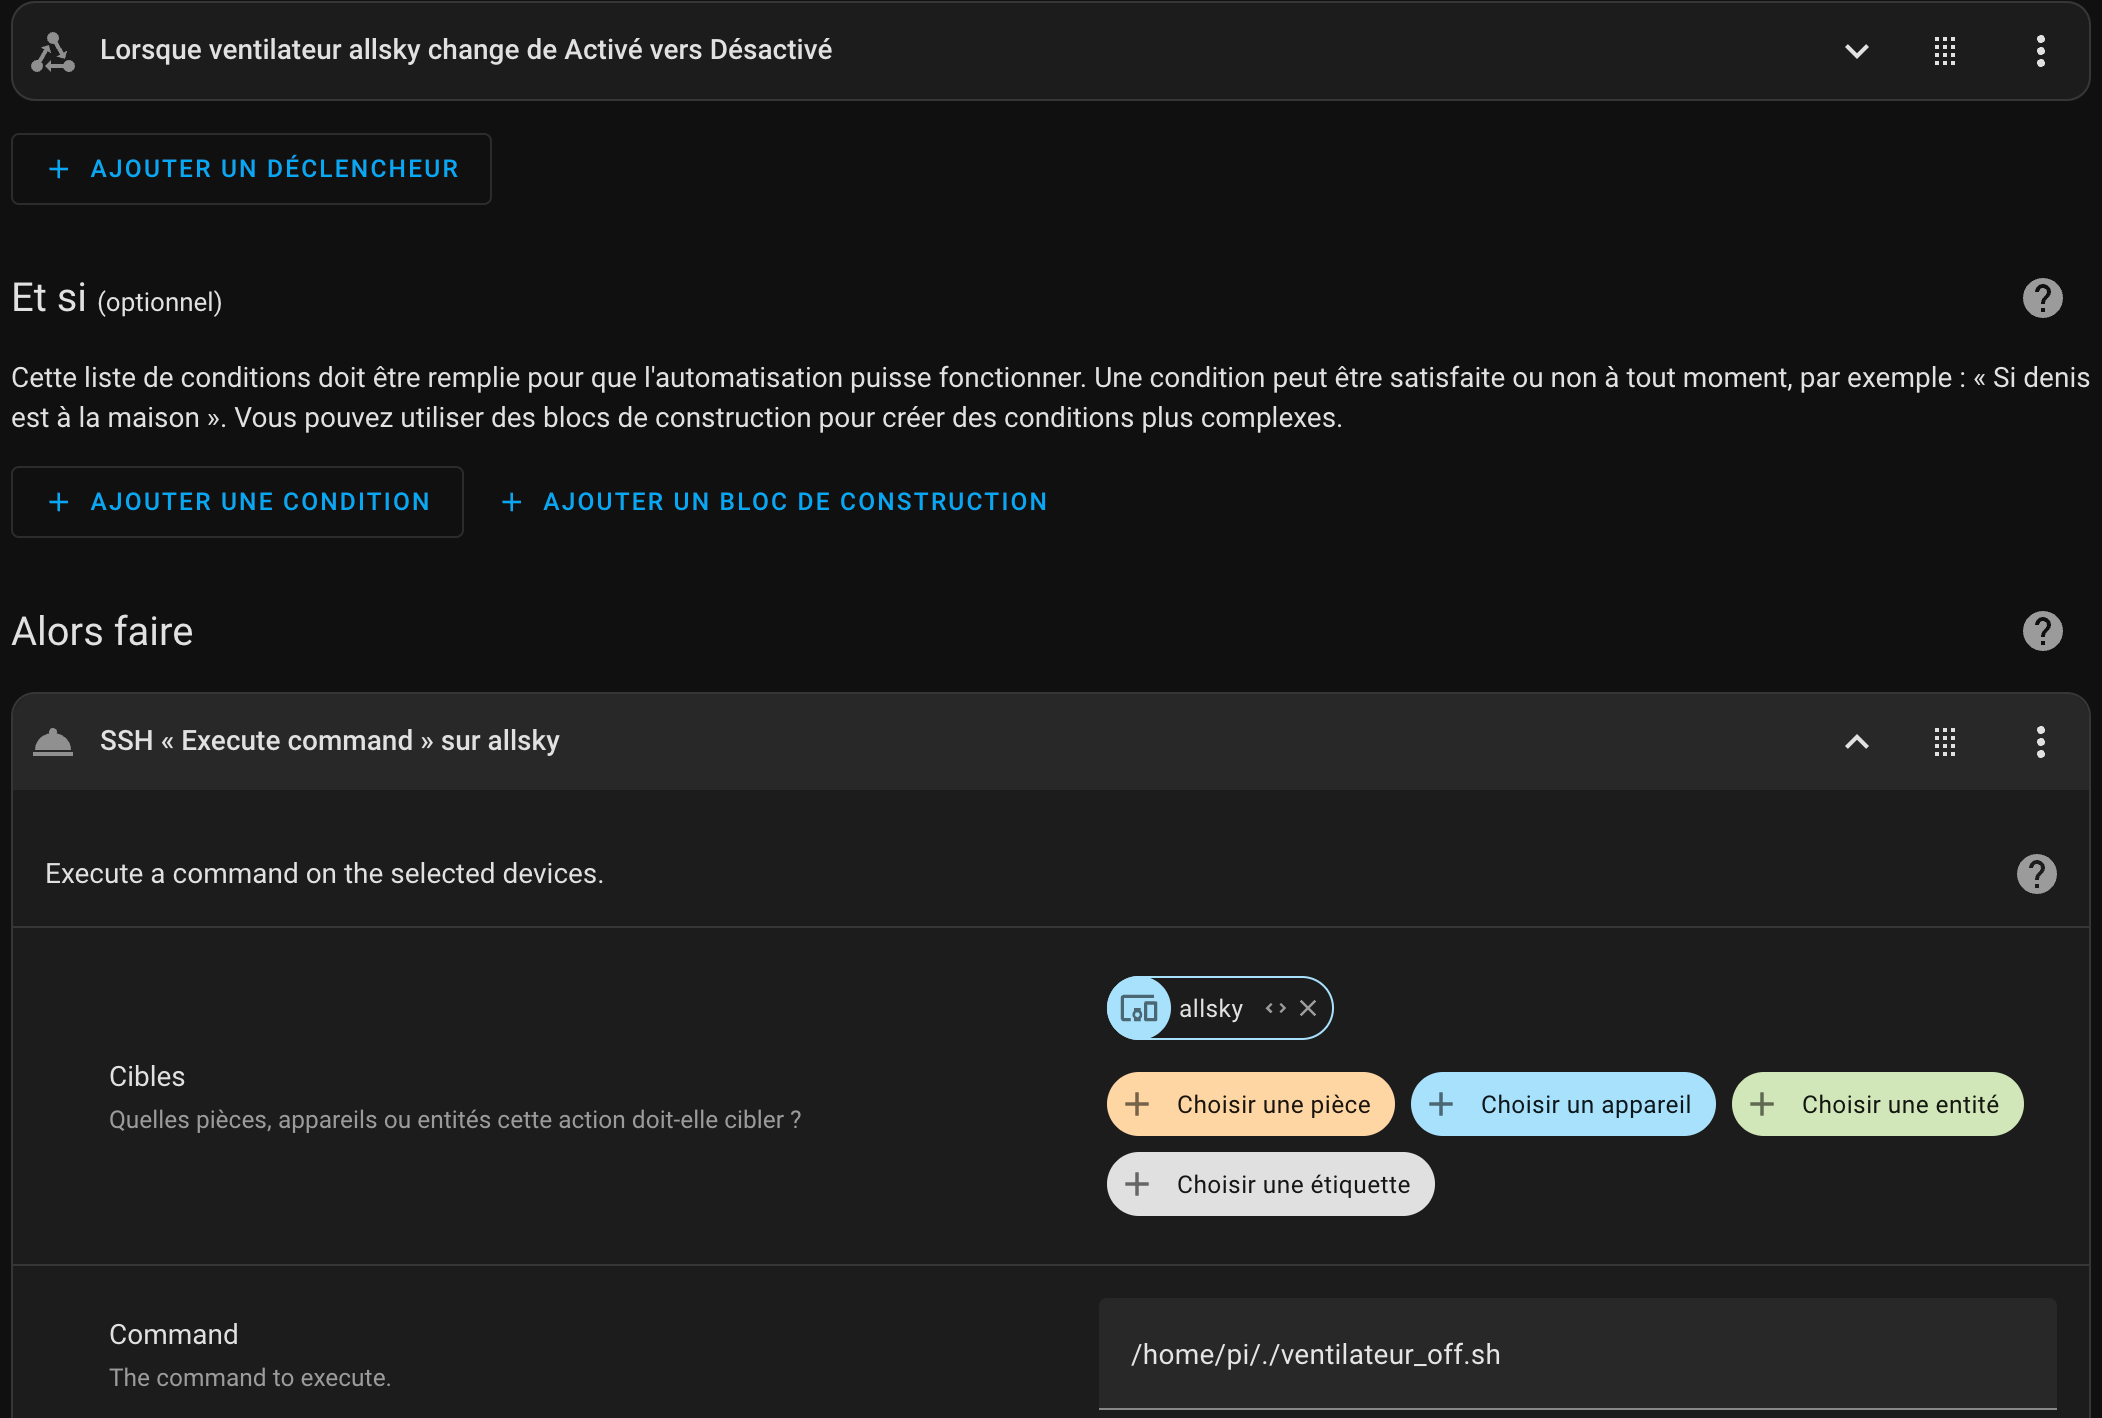
alias: "on"
description: ""
triggers:
  - trigger: state
    entity_id:
      - input_boolean.ventilateur_allsky
    from: "off"
    to: "on"
conditions: []
actions:
  - action: ssh.execute_command
    metadata: {}
    data:
      command: /home/pi/./ventilateur_on.sh
    target:
      device_id: baee8bdf9891c04137408076f2a75f31
mode: single
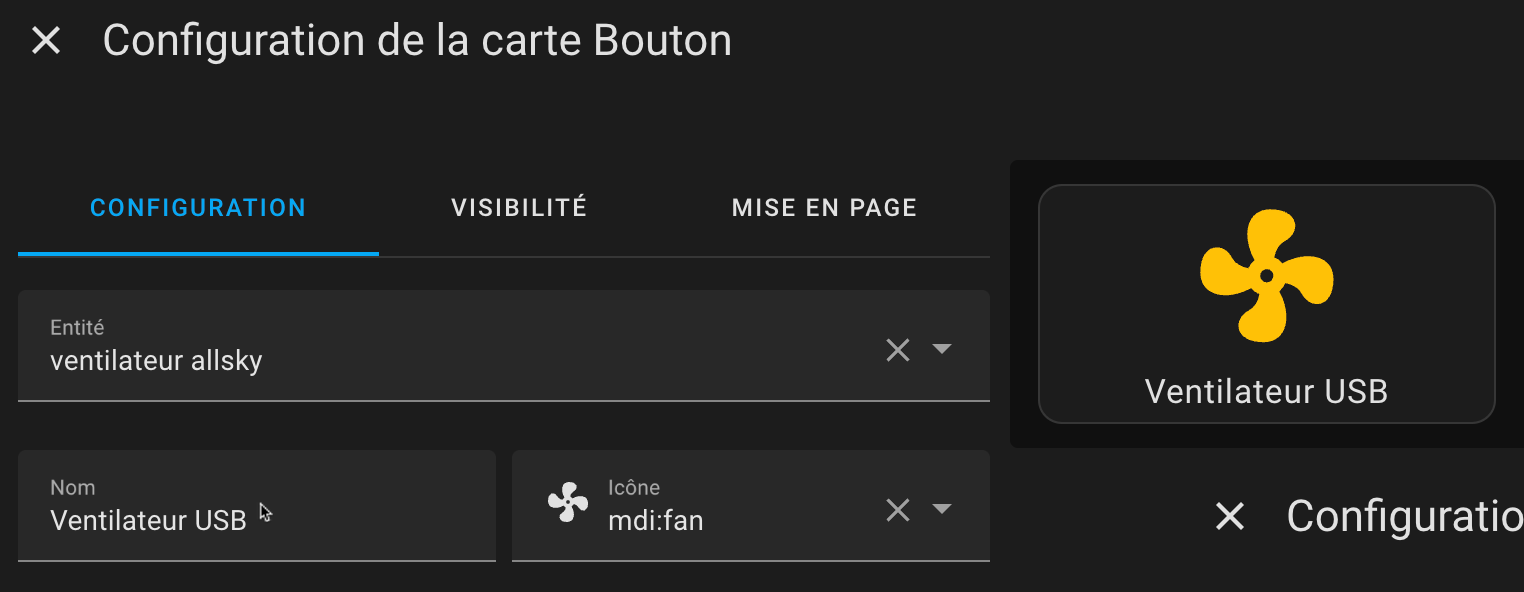
Un peu de cosmétisme
Et voilà